Tracking Hyperparameter Tuning with MLflow
Need help setting up tracking? Try MLflow Assistant - a powerful AI assistant that can help you set up MLflow tracking for your project.
Hyperparameter tuning is an important process for improving the performance of a machine learning model, however, it can be cumbersome to manually track and compare the different trials. MLflow provides a powerful framework for hyperparameter tuning that allows you to systematically explore the hyperparameter space and find the best model.
By the end of this tutorial, you'll know how to:
- Set up your environment with MLflow tracking.
- Define a partial function that fits a machine learning model that can be used with a hyperparameter tuning library.
- Use Optuna for hyperparameter tuning.
- Leverage child runs within MLflow to keep track of each iteration during the hyperparameter tuning process.
Prerequisites: Set up MLflow and Optuna
MLflow is available on PyPI. Install MLflow and Optuna (Hyperparameter tuning library) with:
pip install mlflow optuna
Then, follow the instructions in the Set Up MLflow guide to set up MLflow.
For production environments or team collaboration, consider hosting a shared MLflow Tracking Server. For a fully-managed solution, get started with Databricks Free Trial by visiting the Databricks Trial Signup Page and follow the instructions outlined there.
Step 1: Create a new experiment
import mlflow

# The set_experiment API creates a new experiment if it doesn't exist.
mlflow.set_experiment("Hyperparameter Tuning Experiment")
Step 2: Prepare Your Data
First, let's load a sample dataset and split it into training and validation sets:
from sklearn.model_selection import train_test_split
from sklearn.datasets import fetch_california_housing

X, y = fetch_california_housing(return_X_y=True)
X_train, X_val, y_train, y_val = train_test_split(X, y, random_state=0)
Step 3: Define the objective function
In Optuna, a study is a single optimization task, representing the entire hyperparameter tuning session consisting of multiple trials. A trial is a single execution of the objective function, namely, training a model with a single combination of hyperparameters.
In MLflow, this structure is represented by a parent run and child runs. A parent run is a run that contains all the child runs for different trials. The parent-child relationship allows us to keep track of each trial during the hyperparameter tuning process and group them nicely in the MLflow UI.
First, let's define the objective function that is executed for each trial. To log the parameters,
metrics, and model file, we use MLflow's API inside the objective function. An MLflow run is created
with the nested=True flag to indicate it is a child run.
import mlflow
import optuna
import sklearn


def objective(trial):
    # Setting nested=True will create a child run under the parent run.
    with mlflow.start_run(nested=True, run_name=f"trial_{trial.number}") as child_run:
        rf_max_depth = trial.suggest_int("rf_max_depth", 2, 32)
        rf_n_estimators = trial.suggest_int("rf_n_estimators", 50, 300, step=10)
        rf_max_features = trial.suggest_float("rf_max_features", 0.2, 1.0)
        params = {
            "max_depth": rf_max_depth,
            "n_estimators": rf_n_estimators,
            "max_features": rf_max_features,
        }
        # Log current trial's parameters
        mlflow.log_params(params)

        regressor_obj = sklearn.ensemble.RandomForestRegressor(**params)
        regressor_obj.fit(X_train, y_train)

        y_pred = regressor_obj.predict(X_val)
        error = sklearn.metrics.mean_squared_error(y_val, y_pred)
        # Log current trial's error metric
        mlflow.log_metrics({"error": error})

        # Log the model file
        mlflow.sklearn.log_model(regressor_obj, name="model")
        # Make it easy to retrieve the best-performing child run later
        trial.set_user_attr("run_id", child_run.info.run_id)
        return error
Step 3: Run the hyperparameter tuning study
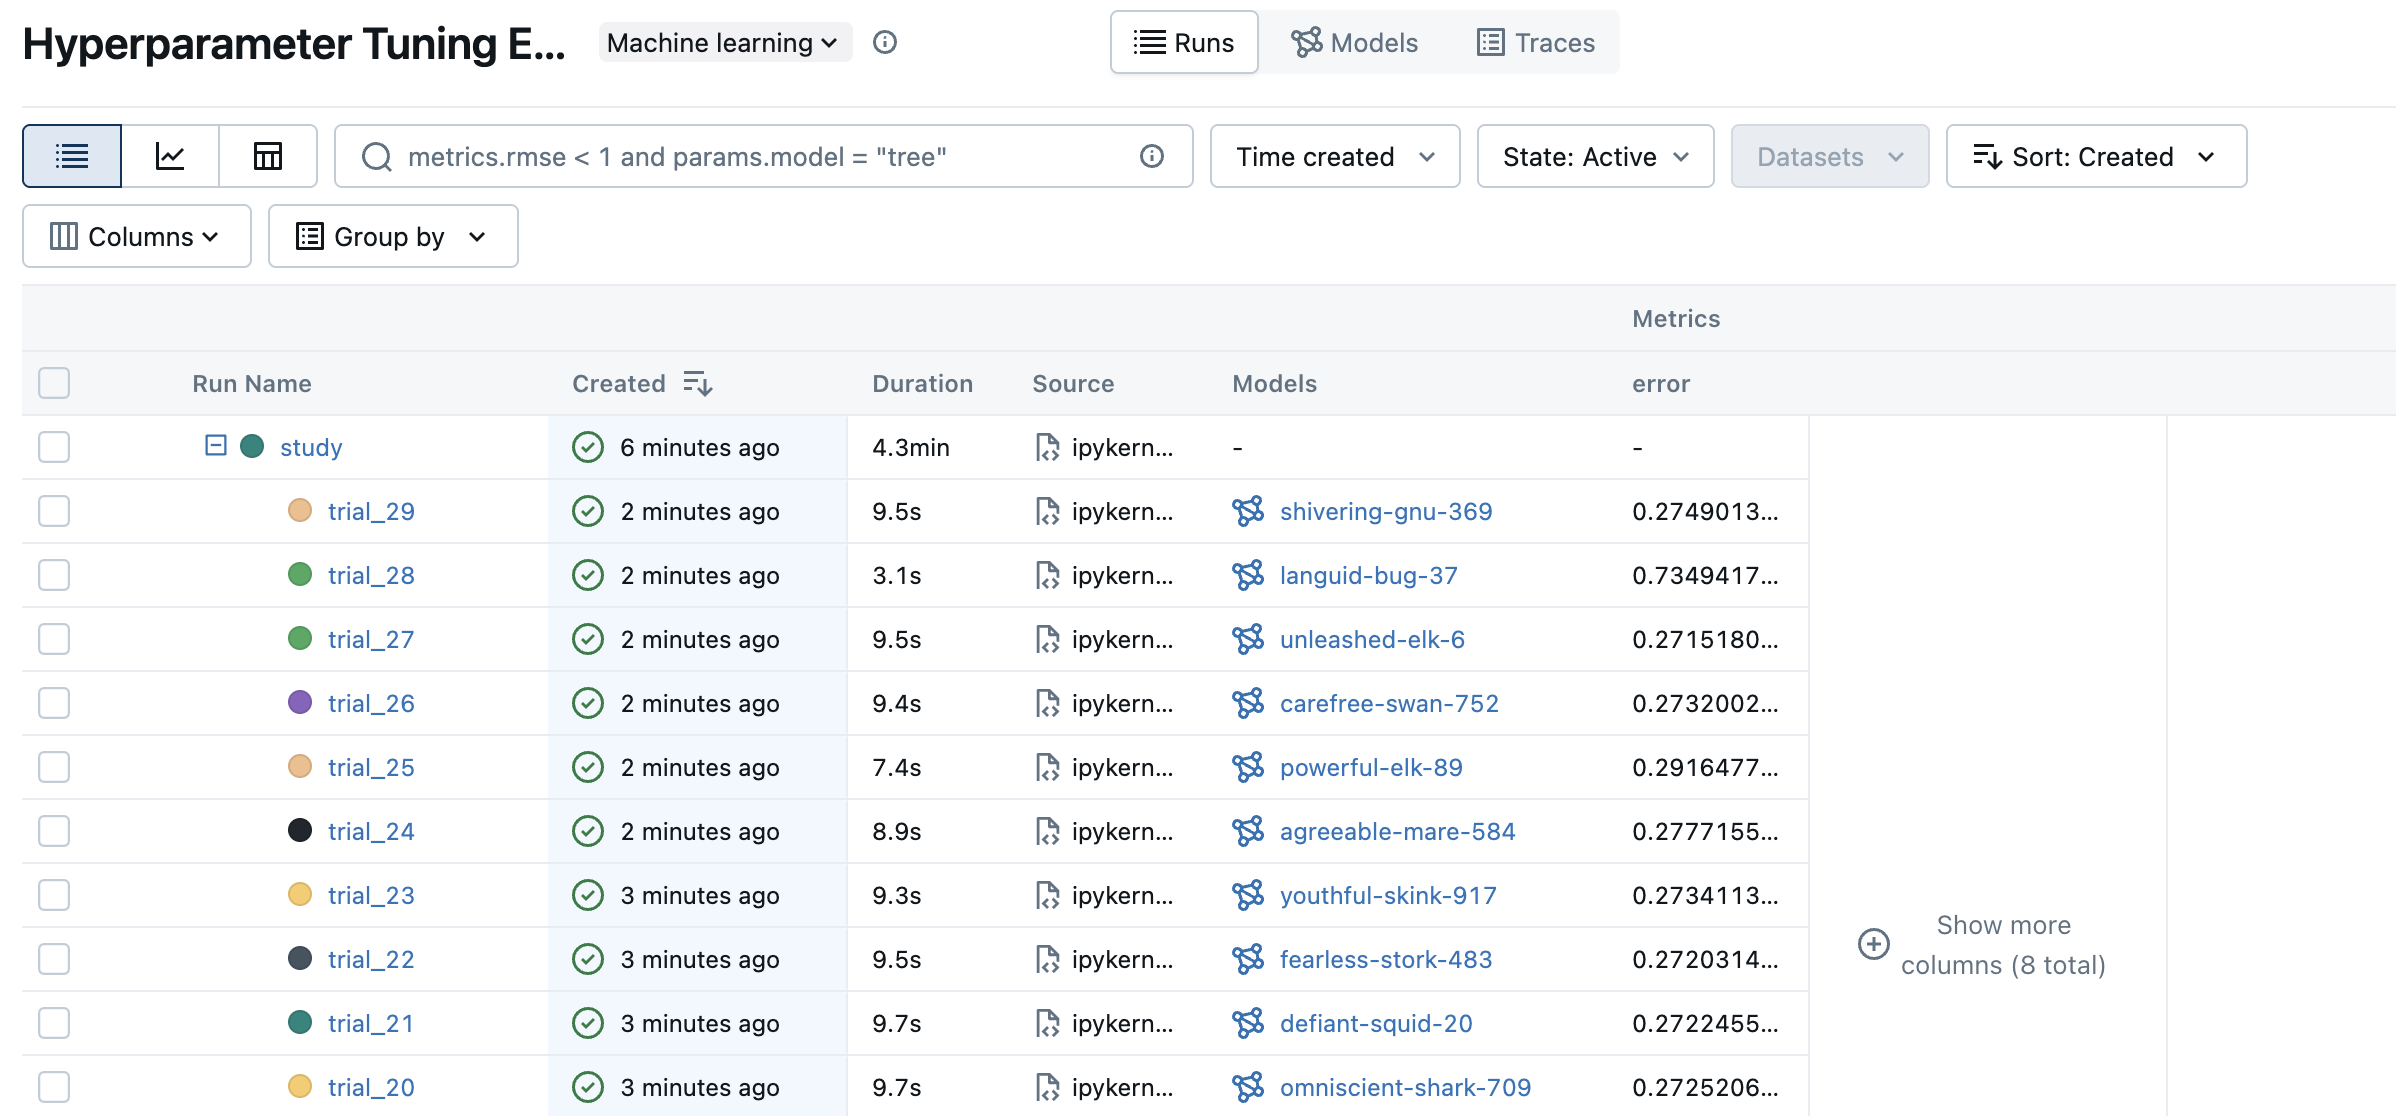
Now, let's run the hyperparameter tuning study using Optuna. We create a parent run named "study" and log the best trial's parameters and metrics there.
# Create a parent run that contains all child runs for different trials
with mlflow.start_run(run_name="study") as run:
    # Log the experiment settings
    n_trials = 30
    mlflow.log_param("n_trials", n_trials)

    study = optuna.create_study(direction="minimize")
    study.optimize(objective, n_trials=n_trials)

    # Log the best trial and its run ID
    mlflow.log_params(study.best_trial.params)
    mlflow.log_metrics({"best_error": study.best_value})
    if best_run_id := study.best_trial.user_attrs.get("run_id"):
        mlflow.log_param("best_child_run_id", best_run_id)
Step 4: View the results in the MLflow UI
To see the results of training, you can access the MLflow UI by navigating to the URL of the Tracking Server. If you have not started one, open a new terminal and run the following command at the root of the MLflow project and access the UI at http://localhost:5000 (or the port number you specified).
mlflow server --port 5000
When opening the site, you will see a screen similar to the following:
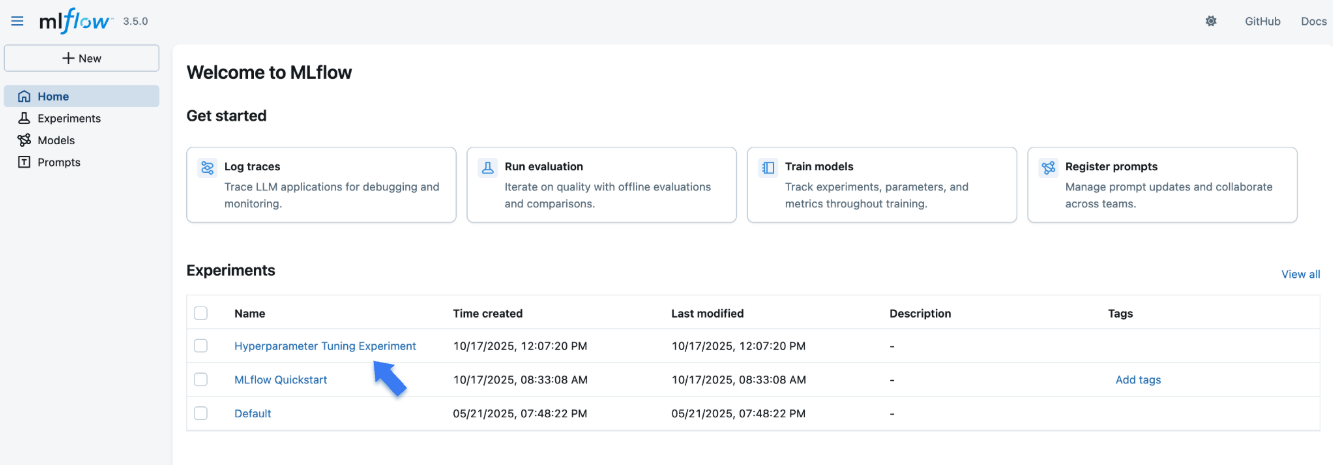
The "Experiments" section shows a list of (recently created) experiments. Click on the "Hyperparameter Tuning Experiment" experiment we've created for this tutorial.
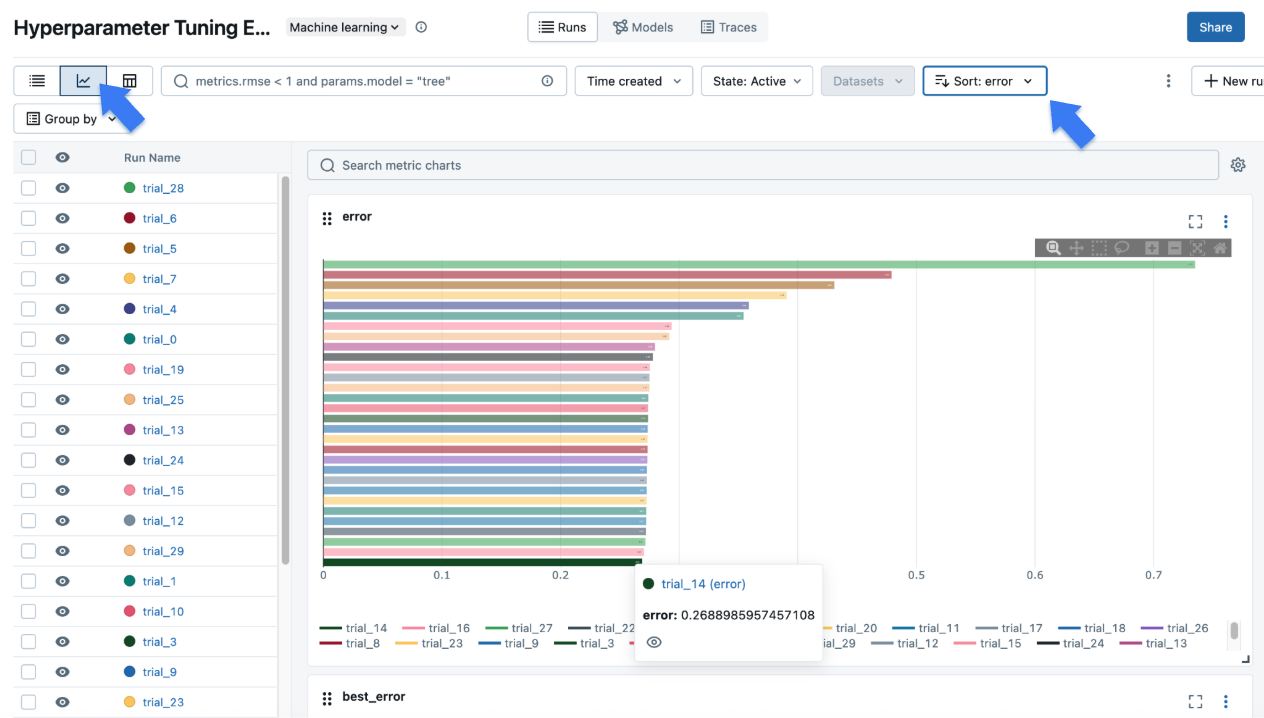
Click the chart icon on the top left corner to view a visual representation of the tuning result. You can further click each child run to see the detailed metrics and parameters for each trial.
Step 5: Register Your Best Model
Once you identified the best trial, you can register the model into MLflow Model Registry for promoting it to production.
# Register the best model using the model URI
mlflow.register_model(
    model_uri="runs:/d0210c58afff4737a306a2fbc5f1ff8d/model",
    name="housing-price-predictor",
)

# > Successfully registered model 'housing-price-predictor'.
# > Created version '1' of model 'housing-price-predictor'.
Next Steps
- MLflow Tracking: Learn more about the MLflow Tracking APIs.
- MLflow Model Registry: Learn how to register and manage model lifecycle in the MLflow Model Registry.
- MLflow for Deep Learning: Learn how to use MLflow for deep learning frameworks such as PyTorch, TensorFlow, etc.
- Self-hosting Guide: Learn how to self-host the MLflow Tracking Server and set it up for team collaboration.