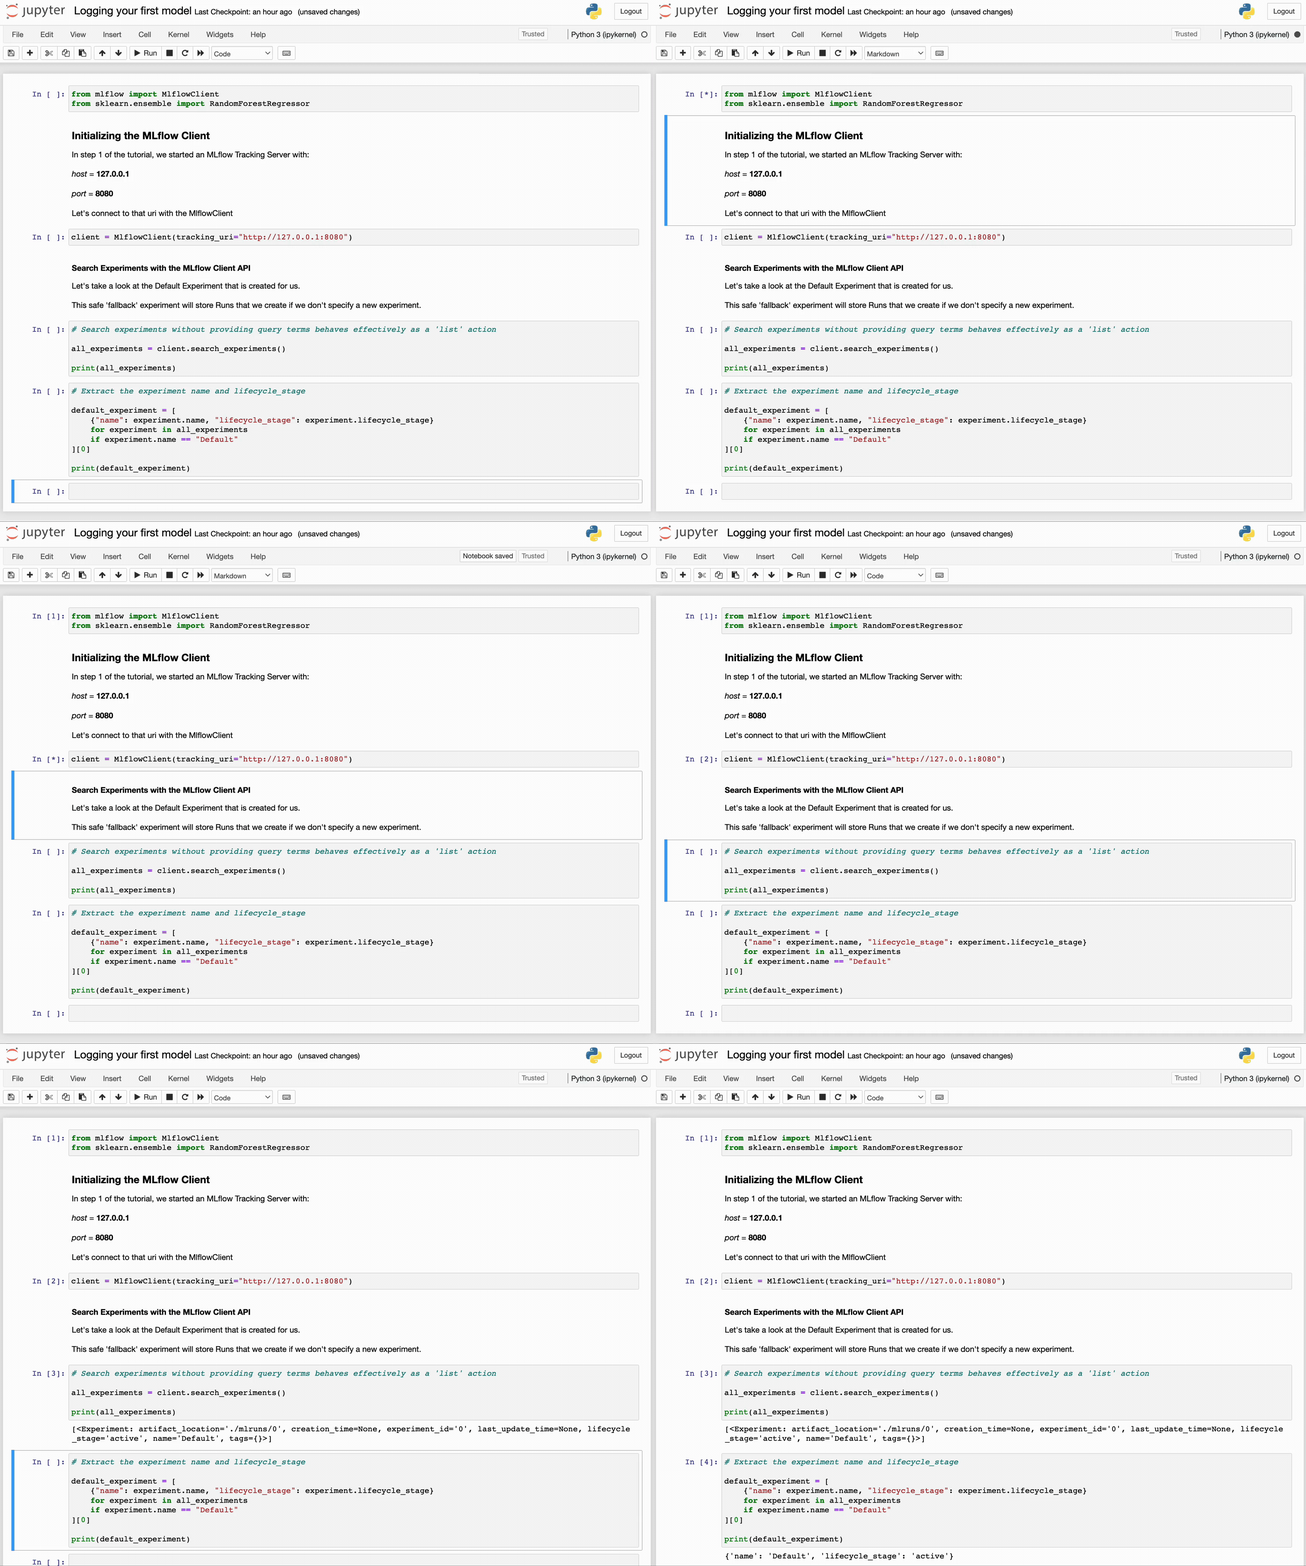
Using the MLflow Client API
In the previous section, we started an instance of the MLflow Tracking Server and the MLflow UI.
For this stage, we’re going to be interfacing with the Tracking Server through one of the primary mechanisms
that you will use when training ML models, the MlflowClient.
For the duration of this tutorial, this client API will be your primary interface for MLflow’s tracking
capabilities, enabling you to:
Initiate a new Experiment.
Start Runs within an Experiment.
Document parameters, metrics, and tags for your Runs.
Log artifacts linked to runs, such as models, tables, plots, and more.
Importing Dependencies
In order to use the MLflowClient API, the initial step involves importing the necessary modules.
from mlflow import MlflowClient
from pprint import pprint
from sklearn.ensemble import RandomForestRegressor
With these modules imported, you’re now prepared to configure the client and relay specifics about the location of your tracking server.
Configuring the MLflow Tracking Client
By default, barring any modifications to the MLFLOW_TRACKING_URI environment variable, initializing
the MlflowClient will designate your local storage as the tracking server.
This means your experiments, data, models, and related attributes will be stored within the active execution directory.
For the context of this guide, we’ll utilize the tracking server initialized earlier in the documentation, instead of using the client to log to the local file system directory.
In order to connect to the tracking server that we created in the previous section of this tutorial, we’ll need to use the uri that we
assigned the server when we started it. The two components that we submitted as arguments to the mlflow server command were the
host and the port. Combined, these form the tracking_uri argument that we will specify to start an instance of the client.
client = MlflowClient(tracking_uri="http://127.0.0.1:8080")
We now have a client interface to the tracking server that can both send data to and retrieve data from the tracking server.
The Default Experiment
Before we get to logging anything to the Tracking Server, let’s take a look at a key feature that exists at the outset of starting any MLflow Tracking Server: the Default Experiment.
The Default Experiment is a placeholder that is used to encapsulate all run information if an explicit Experiment is not declared. While using MLflow, you’ll be creating new experiments in order to organize projects, project iterations, or logically group large modeling activities together in a grouped hierarchical collection. However, if you manage to forget to create a new Experiment before using the MLflow tracking capabilities, the Default Experiment is a fallback for you to ensure that your valuable tracking data is not lost when executing a run.
Let’s see what this Default Experiment looks like by using the mlflow.client.MlflowClient.search_experiments() API.
Searching Experiments
The first thing that we’re going to do is to view the metadata associated with the Experiments that are on the server. We can accomplish this through the
use of the mlflow.client.MlflowClient.search_experiments() API. Let’s issue a search query to see what the results are.
all_experiments = client.search_experiments()

print(all_experiments)
[<Experiment: artifact_location='./mlruns/0', creation_time=None, experiment_id='0', last_update_time=None, lifecycle_stage='active', name='Default', tags={}>]
It is worth noting that the return type of the search_experiments() API is not a basic collection structure. Rather, it is a list of
Experiment objects. Many of the return values of MLflow’s client APIs return objects that contain metadata attributes associated with the task being performed. This
is an important aspect to remember, as it makes more complex sequences of actions easier to perform, which will be covered in later tutorials.
With the returned collection, we can iterate over these objects with a comprehension to access the specific metadata attributes of the Default experiment.
To get familiar with accessing elements from returned collections from MLflow APIs, let’s extract the name and the lifecycle_stage from the search_experiments()
query and extract these attributes into a dict.
default_experiment = [
    {"name": experiment.name, "lifecycle_stage": experiment.lifecycle_stage}
    for experiment in all_experiments
    if experiment.name == "Default"
][0]

pprint(default_experiment)
Running it
In the next step, we’ll create our first experiment and dive into the options that are available for providing metadata information that helps to keep track of related experiments and organize our runs within experiments so that we can effectively compare the results of different parameters for training runs.
